


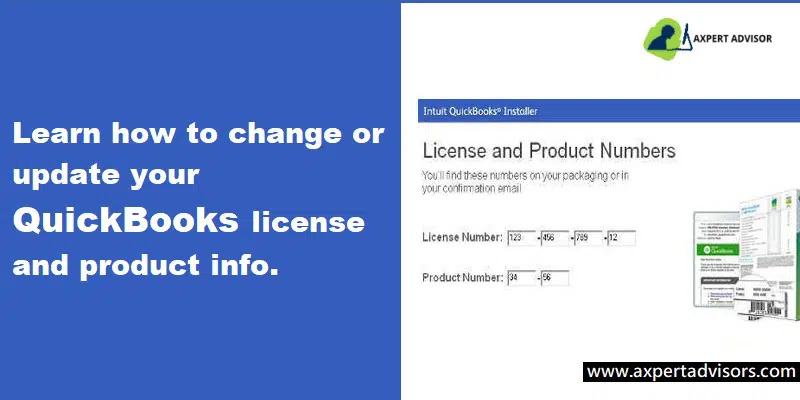
You may have to update QuickBooks license and product number at any time in QuickBooks. Fortunately, you don’t have to worry about it since both these items can be simply modified in Windows and Mac computers. In this article, you can learn how to change QuickBooks Desktop License Number or Product code.
Alternatively, you can also call our certified QuickBooks technicians to get instant assistance.
Also read: Optimize Your Website For Quick Ranking In Google
Steps to change the License Number for Windows and Mac
QuickBooks Desktop for Windows
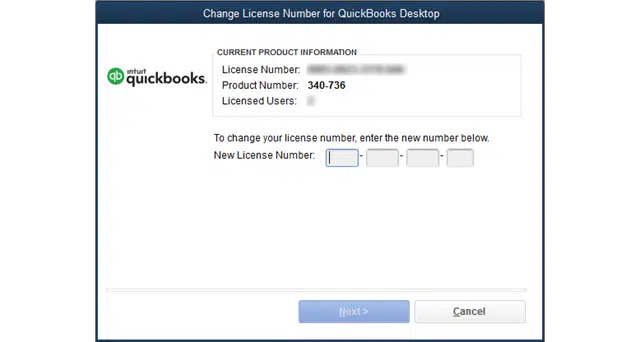
- Change your license number by selecting Manage My License from the Help menu in QuickBooks.
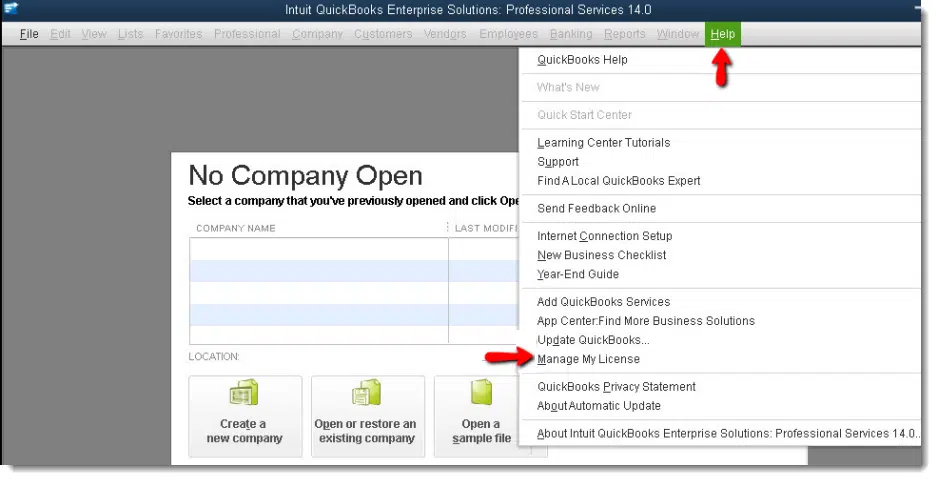
- Select Next and then Finish after entering the new license number.
QuickBooks Desktop for Mac
- Select Manage My License and then Deauthorize this computer from the QuickBooks menu.
- When prompted, choose Deauthorize and Quit from the drop-down menu.
- Activate QuickBooks again and continue the registration procedure. It will allow you to change your license.
Steps to Change the QuickBooks Product Code (Windows Users Only)
Solution 1: Uninstall QuickBooks and then install it again
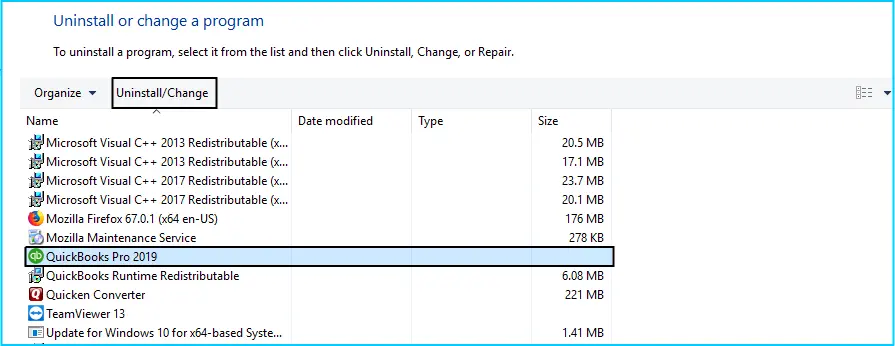
- To alter your product code, if your company has five or fewer machines running Pro, Premier, or Enterprise, the best option is to reinstall the program.
- Reinstall QuickBooks desktop once it has been removed.
- To use QuickBooks, you must first activate it.
Solution 2: Edit your qbregistration manually

This reinstall procedure is recommended for those who have installed QuickBooks Enterprise on five or fewer PCs. For those who have more than five PCs running Enterprise, reinstalling might be tedious.
- Editing a file named “qbregistration.dat” is another option to change your product code. The product codes for all of your QuickBooks installations are stored in this file.
Note: If you don’t feel at ease following these instructions, we suggest that you contact an IT specialist.
Step 1: Open qbregistation.dat file.
- Open QuickBooks desktop.
- Open the Tech Help window by pressing F2 (or Ctrl+1) and then F3 (or Ctrl+2).
- Click QBREGISTRATION.DAT on the Open File tab, and then select Open File. Notepad will be used to open the file.
- Please take a copy of the qbregistration.dat file and save it somewhere safe. The file will not open properly if there are any typos. This is a critical stage.
- Using the File menu in Notepad, choose Save As.
- In the Save As box, choose Desktop as the destination before clicking Save.
- Close the document.
- Go back to Tech Help and re-open the file you worked on before.
- The qbregistation.dat file should remain open in Notepad when QuickBooks is shut down.
Step 2: Change your qbregistration
- Press Ctrl + H in the qbregistration.dat file to see edit and replace feature.
- In the Find what area, enter your previous product number and in the Replace with field, enter your new product number. When entering the product number, use the format XXX-XXX.
- Click on Replace All.
- To save and close the file, choose file, and then Save.
Step 3: Verify the product code you entered
- Open QuickBooks.
- Go to the Product Information window (press F2 on your keyboard).
- Verify that the product code has been changed in the “Product number” column.
To find out how to modify QuickBooks license and product number, follow the instructions for the user you have in your account. The answers are also based on the operating system you’re using.
Get in contact with our QuickBooks desktop support staff if you have any questions regarding how to locate QuickBooks license numbers and how to add user licenses. You can also call us at 1-800-615-2347 or engage in a live chat with our accounting experts.


Add Comment