


How to draw a koi fish
Learn to draw a large koi fish with easy drawing ideas and a step -by -step instructions and tutorial. Now you can easily create a magnificent Koi fish drawing. Koi is a great colorful variety of fish known as a tent. The Japanese word Koi means “tent.” Most tents are brown or gray, but in Japan, bright colors are designated under the name of Nishikigoi, or “tent in Broncos.” Brocade is a woven material with a brilliant structure that the fish would see. From ancient times, at least since the 5th century BC. C., the tent has been domesticated and raised as a food source.
More than 1,000 years ago in China, breeders began selecting natural color variations, improving them over time. The result? Beautifully colorful ornamental fish as we see today. Many people worldwide appreciate the hobby of keeping Koi and their cousins of her distance from their redfish. Another Japanese word, Koi, means “love,” and serious collectors like their koi fish. Some goalkeepers bind to passionate koi clubs, and the fish sometimes cost hundreds of dollars each.
Koi fish images have long been presented in Japanese art. Today, they are still a popular photography theme, paintings, clothing models, and adult coloring books. Do you want to draw your own Koi fish? It is easy with the help of this simple drawing tutorial and step by step. All you need is a pencil, a good draft and a sheet of paper. You can also want to wear pencils, colored pencils, paintings, or markers to shade your finished fish. Did you know that the colorful pattern of our Koi drawing can also be an excellent lure design? Follow these loss painting instructions, and you can also start creating your fishing lures.
Drawing a koi fish
Step 1:
Start drawing a circle. It will create the head of the fish.
Step 2:
Extend two lengthy curved lines from the lid and flank of the circle. These describe the curved body of the fish.
Step 3:
Use a long “m” loose line to enclose the fish’s tail.
Step 4:
Add the fins to the body of the fish. Do it when verifying irregular shapes along the sides of the fish. There must be a pectoral fin on each side of the head of the fish and two other fins near its tail.
Step 5:
Detail your koi fish. Along the bottom of each fin and the tips of the tail, they track short straight lines, indicating the coasts of the fins. Then draw a curved line in the center of the face, providing depth. Draw a curved and loose line in the form of a “V” on the side of the face, further detailing the contour. Finally, draw the dorsal fin on the back of the fish. Do it surrounding an elongated and curved triangle that follows the curvature of the fish.
Step 6:
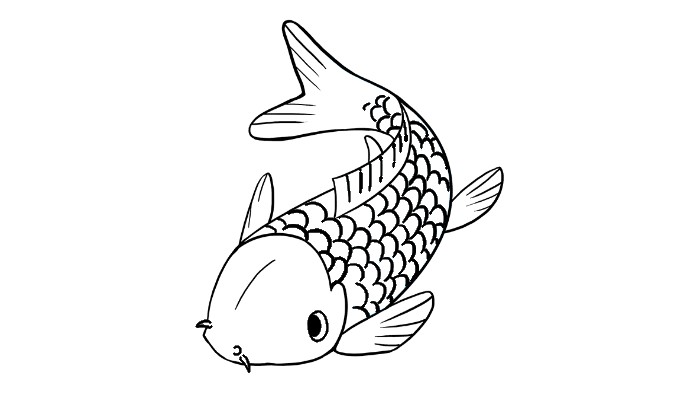
Complete your fish with additional details. Draw short and grooved lines through the dorsal fin. Draw a small oval in a larger oval to indicate the eye; Shadow the smallest oval. Draw a small, almost complete circle at the end of the fish. In addition, draw the chin or mustache using two short folded lines at one point. Draw a second Barbillon on the other side of the face. Finally, draw scales throughout the body of the fish. Do it using short and connected lines in “U.”
Step 7:
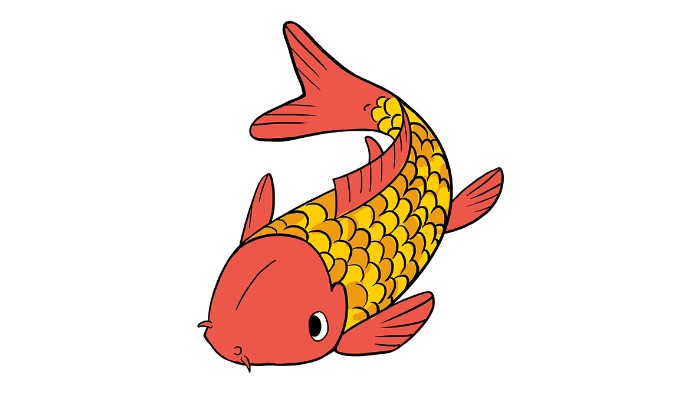
Color your koi fish. This type of fish is often observed in white, brown, orange, red, green, and gold tones.
Also Read: Creative drawing ideas of still life


Add Comment